Kayak Camping in Algonquin Provincial Park
  • Home
  • What's New
  • Trip Logs
    • 2018 - Achray - Clover - Tarn - St. Francis >
      • Part 2: Clover to Stratton
      • Part 3: Stratton, High Falls, St. Francis
      • Part 4: Barron Canyon
    • Rock - Louisa - Welcome
    • Opeongo - Catfish
    • Kiosk - Erables - Catfish - Cedar
    • Canoe - Joe - Burnt Island
    • Canoe - McIntosh - Shah
    • Shall - Booth - Shirley - McKaskill
    • Opeongo - Shippagew
    • Opeongo - Round Island >
      • Opeongo - Round Island Part 2
    • Magnetawan - Rosebary - Shah >
      • Magnetaway - Rosebary - Shah Part 2
    • Kiosk - Mouse - Maple >
      • Kiosk - Mouse - Maple Part 2
      • Kiosk - Mouse - Maple Part 3
    • 2017: One Day Failed Trip
  • Blog
  • Gear
    • Kayak Yoke
    • Camping Checklist
  • Photo Gallery
  • About
    • Contact

Kayak Yoke

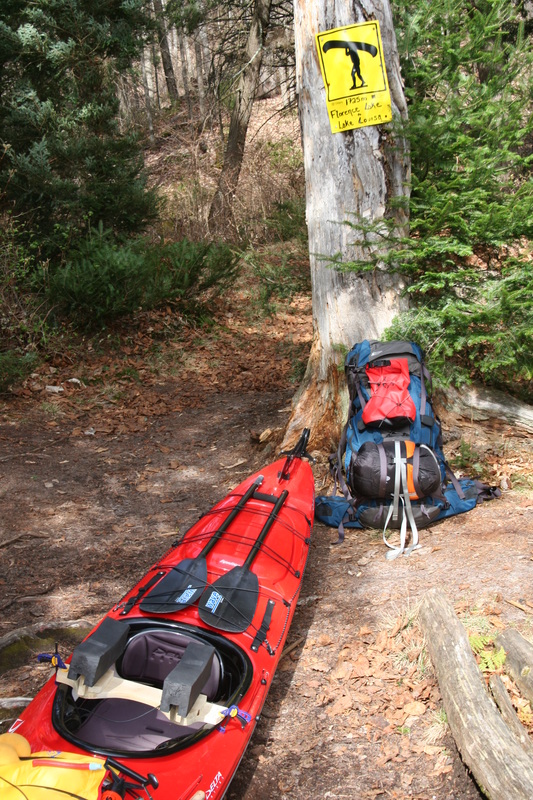
The canoe rules the backcountry for two reasons: it carries a lot of gear, and is easily portaged. The camper steps out of the canoe, puts their pack on their back, flips the canoe over onto their shoulders and begins walking.
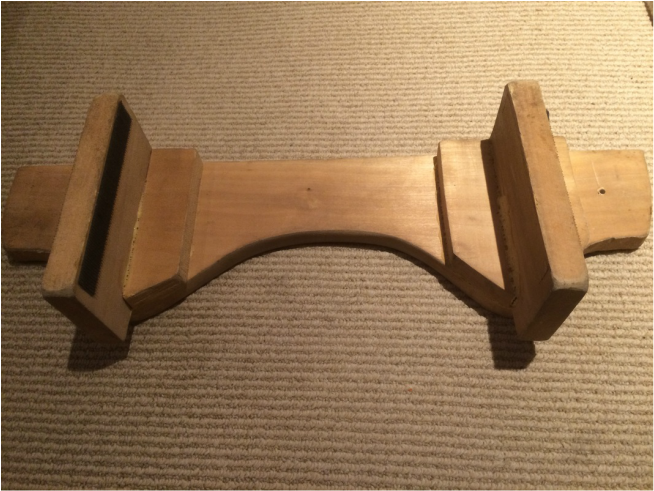
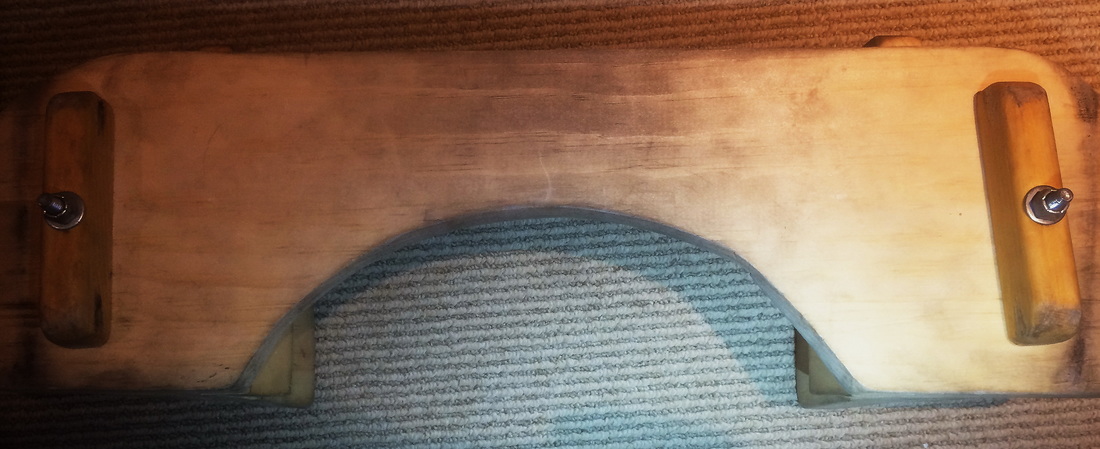
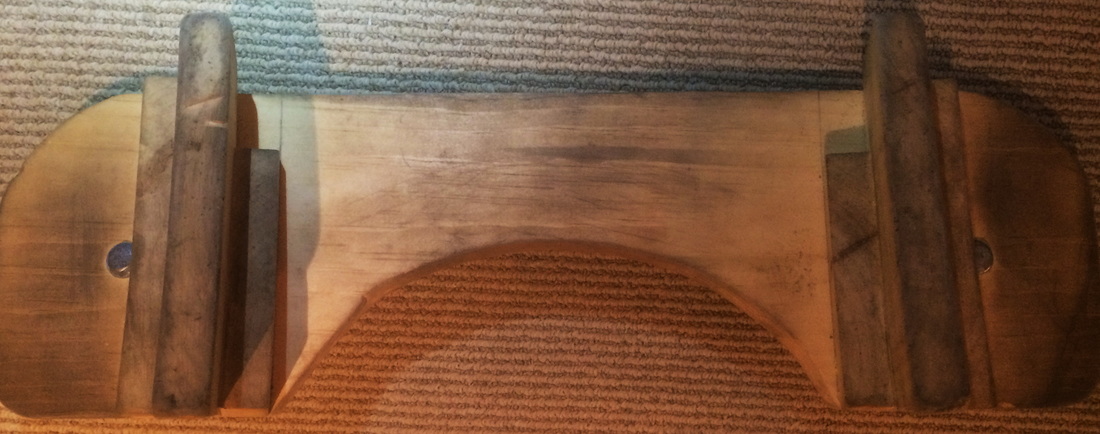
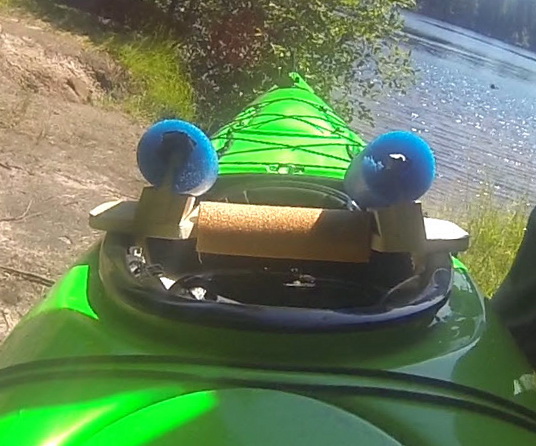
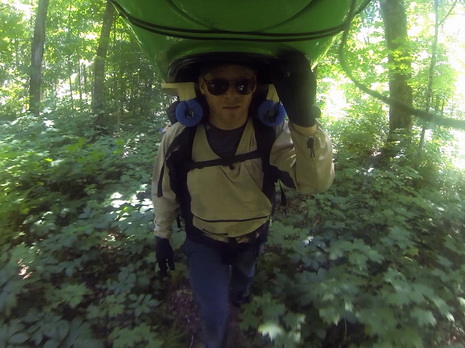
A kayak will never be that easy to portage, but I've put a lot of time, thought and effort into narrowing the gap. The biggest challenge of portaging a kayak is... well... portaging a kayak! Anyone who's ever put a kayak on their shoulder realizes pretty quickly that you're not going to carry it far without needing a break. And the one-shoulder style makes carrying a pack at the same time pretty much impossible. So when I first decided I wanted to do serious interior camping with a kayak, the first thing I did was design and build a kayak yoke. This one, to be exact:
Picture
I built that yoke out of Maple, thinking I needed the strength of a hardwood. It was the first yoke I ever built, the smallest, and by far the heaviest. It got the job done... somewhat. Here's what it looked like on my kayak - with a bonus shot of the frame pack I was using at the time.
Picture
The two biggest flaws with that design:

1. It was clamped to the cockpit of the kayak. Those tiny little clamps were meant for small craft work, and I was relying on them to keep a yoke attached to 60+ pounds of kayak and gear. They failed regularly enough that I brought four of them on every trip.
2. The pads you see on the yoke are cut-down kayak blocks. At this early stage there was absolutely nothing attaching those blocks to the yoke. I learned the trick of flipping my kayak over in one super-smooth efficient motion to get it on my shoulders before the pads fell off... most of of the time. But they'd regularly shift or come off while I was portaging, which was always frustrating.

The trouble is, the design was just good enough that I went a few years without making any major redesigns. I put velcro on the yoke and on the pads to address the biggest problem and stopped worrying about it. But it was a cumbersome pain in the behind that caused me to regularly stop during portages to fix various problems: a failed clamp, a pad that slipped off. Not terrible, but enough to be annoying.

Finally I'd had enough, and as luck would have it, I'd reconnected with an old friend (Josh) who was keen to come camping with me. I took my yoke to him, and he came up a crucial improvement - a way to attach the yoke to the kayak that didn't require clamps, or ropes, or fastening of any kind. We didn't actually realize at the time how good his idea was, so the first trip out he was using ropes and I was still using my clamps to support his change. Here's how the underside of every yoke since has looked:
Picture
See those two small pieces of wood held on by lock nuts? Those are reasonably tight, but not so tight they can't move. When you set the yoke onto the cockpit and push it forward (all cockpits taper towards the front), those pieces of wood lock  the yoke into place. As you carry the kayak with the bow higher than the stern, gravity is constantly helping keep that bond secure. On the kayaks it's been tried on, this mechanism works flawlessly.

I'll skip the rest of the evolution, but suffice to say there's been many changes. Here's the top of my latest. If it looks well-used, it because it is. This is just simple pine - lightweight, water resistant, and tough enough for what it's used for.
Picture
Here's a couple more shots: the yoke attached to my kayak with its pads on (pieces of pool noodle), and one of me portaging using it. They're both still from video so forgive the quality. I'll find better pictures to use eventually!
Picture
Picture
I have some videos up on Youtube that show the yoke off in more detail. I don't have a "here's how to build one" video (yet), but I've sent a bunch of information on to many people who've asked, so I can probably help you somewhat if you're looking to make your own.
 
Here's a 3D, rotatable PDF of my kayak yoke. This was made for me by someone who saw my yoke video on Youtube and was planning on building one themselves. The file tends to show up blank in a browser, but if you download it and open it in a PDF viewer like Adobe Acrobat it will work properly. 
kayak_yoke.pdf
File Size: 2053 kb
File Type: pdf
Download File

Picture


​Links


Friends of Algonquin Provincial Park
Jeff's Maps
Algonquin Adventures Forum
Canadian Canoe Routes

Mark in the Park

Delta Kayaks
Mountain Science Research
Werner Paddles

  • Home
  • What's New
  • Trip Logs
    • 2018 - Achray - Clover - Tarn - St. Francis >
      • Part 2: Clover to Stratton
      • Part 3: Stratton, High Falls, St. Francis
      • Part 4: Barron Canyon
    • Rock - Louisa - Welcome
    • Opeongo - Catfish
    • Kiosk - Erables - Catfish - Cedar
    • Canoe - Joe - Burnt Island
    • Canoe - McIntosh - Shah
    • Shall - Booth - Shirley - McKaskill
    • Opeongo - Shippagew
    • Opeongo - Round Island >
      • Opeongo - Round Island Part 2
    • Magnetawan - Rosebary - Shah >
      • Magnetaway - Rosebary - Shah Part 2
    • Kiosk - Mouse - Maple >
      • Kiosk - Mouse - Maple Part 2
      • Kiosk - Mouse - Maple Part 3
    • 2017: One Day Failed Trip
  • Blog
  • Gear
    • Kayak Yoke
    • Camping Checklist
  • Photo Gallery
  • About
    • Contact